
This section explains the steps required to configure a 3D model in Bambu Studio before printing.
2.1.1 Add model
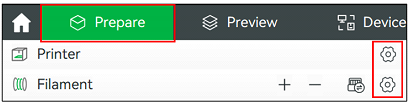
Click on the first Add icon located on the top toolbar of the Prepare panel, as shown in
Figure 6:
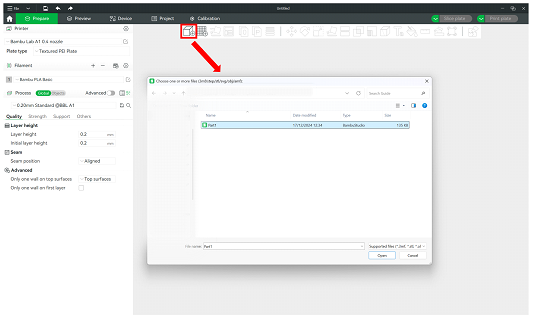
Figure 6: Add a model into BambuStudio
2.1.2 General configuration of printing parameters
To configure the general printing parameters for the model, follow the steps shown in Figure 7:
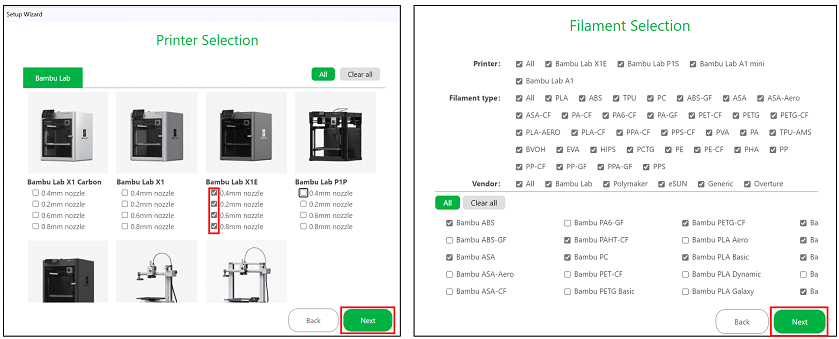
- Select the printer: Choose the printer from the drop-down list under the Printer option. In this case, the printer model is Bambu Lab X1 Carbon with a 0.4 mm nozzle.
- Filament option: Different types of filaments can be added by selecting both the material and color. In this case, Generic PLA filaments will be created.
- Process drop-down menu: Choose the layer height for printing the model. The lower the layer height, the longer the print will take, but the model will have more detail with fewer visible layer lines. A 0.20 mm layer height is the standard for most prints.
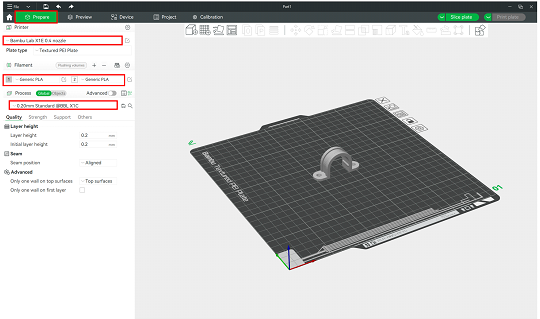
Figure 7: Configure general printing parameters
If the file contains multiple objects, the parameters for each of them can be configured individually. To do this, follow the instructions in Figure 8:
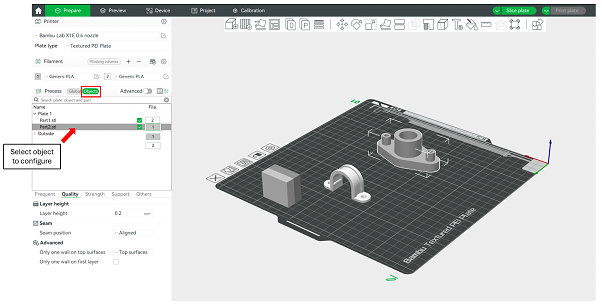
Figure 8: Configure parameters with a design with more than 1 object
2.1.3 Advanced configuration of printing parameters
The Advanced option, shown in Figure 9, gives users more detailed and specific control over printing parameters. Enabling this option allows users to optimize and customize their 3D prints.
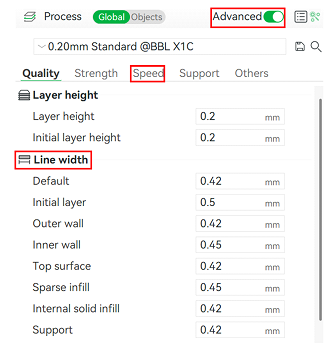
Figure 9: Configure advanced printing parameters
2.1.4 Adding print supports
Enabling print supports is essential when a model has parts that are not well supported or do not have direct contact with the heated bed, such as overhangs or arches.
There are two types of supports available:
- Normal support: This is the standard support generated by creating vertical lines under the areas that require support.
- Tree support: This type of support is branched, simulating the shape of a tree. It consumes less material than the normal support type while still providing stability.
It is important to note that generating supports increases both filament consumption and printing time.
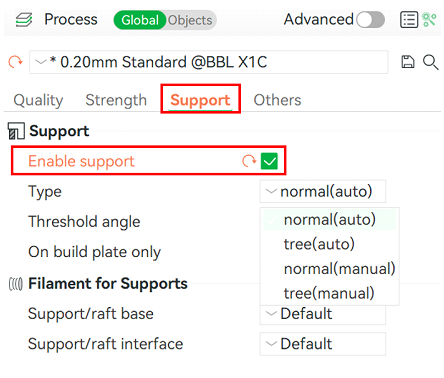
Figure 10: Enable print support
2.1.5 3D Model Modification
The available options for modifying the 3D model to be printed are described below. To access these options, click on the object, and the features shown in Figure 11 will be enabled.
Figure 11 : Model modification options
- Model rotation
The “rotate” icon allows rotating the model around each of its axes X, Y, Z, which will be displayed when this option is activated as shown in Figure 12.
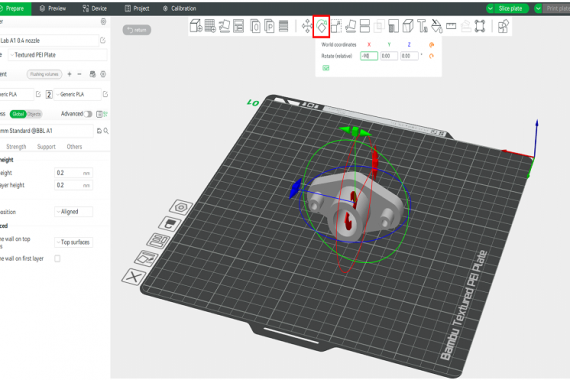
Figure 12: Rotate model
⦁ Measurement between model planes
The “measure” option allows measuring the distance in millimeters (mm) or the angle in degrees (º) between two planes as shown in Figure 13.
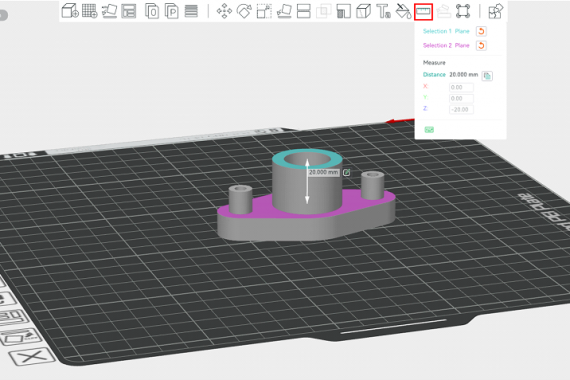
Figure 13: Measurement between two planes
⦁ Model scale modification
The “scale” option allows entering a scale factor to adjust the size of the model. When the “uniform scale” option is enabled, the entered factor will be applied to all axes as shown in Figure 14.
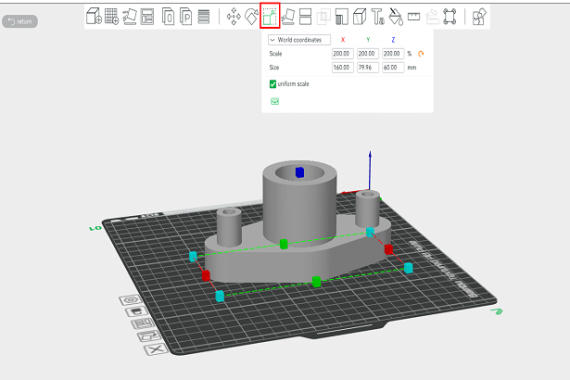
Figure 14: Factor scale to adjust the model
To run the simulation, select the Slice plate option in the Prepare panel.
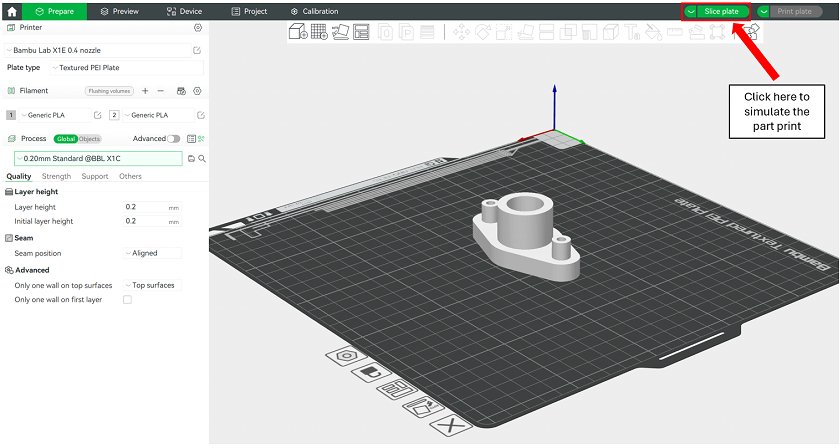
Figure 15: Slicing a model
In the Preview panel, the following information will appear as shown in the Figure 16:
⦁ Information of the printing process: It helps the user evaluate the material or printing parameters chosen before starting the real print.
⦁ Progress of the simulation across the different layers: It helps to detect an issue before initiating the print process.
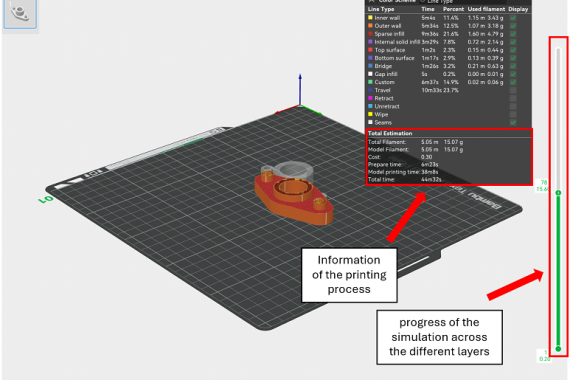
Figure 16: Model simulation
Once the model has been designed and simulated, connecting to the digital twin to send the model to the 3D printer requires downloading the AnyDesk program from the following link: https://anydesk.com/es. After installing it, follow these steps:
⦁ To access the digital twin, enter the remote address (ID number) provided by the lab team in the upper text box of AnyDesk (highlighted in the Figure 17).
⦁ Wait for the lab team to grant you access to the digital twin.
⦁ Once access is granted, open BambuStudio and import your designed model. This device is already connected to the 3D printer via a wireless connection.

Figure 17: Access to the digital twin of the 3D printer
To send the designed model to the 3D printer after slicing, follow the steps shown in Figure 18.
- First, in the Preview panel, click Print plate in the top right corner.
- Select the printer model 3DP-03W-925 and leave all options checked by default, as shown in Figure 18, then click the send button.
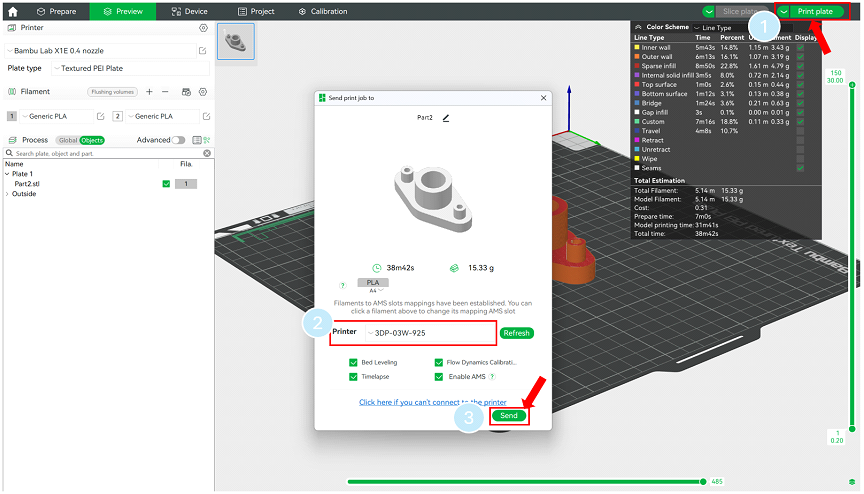
Figure 18: Send part’s model to the 3D printer
The Device panel on Bambu Studio will allow you to control and monitor the print remotely in real time. You can find the “Printing progress” as shown in Figure TAL of the current print job and stop or pause/resume it. Wether printing or not you can monitor the printer from the “Camera” tab.
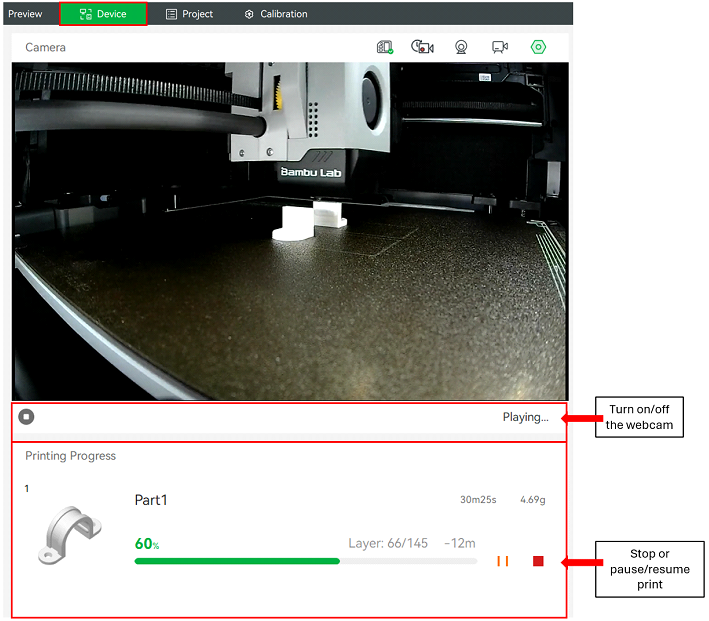
Figure 19 : Printing progress
The Device panel also provides “Control widgets” in the right panel for the following controls as shown in Figure 20:
⦁ X/Y/Z/E movement: Allows precise manual movement of the printer’s axes and the extruder.
⦁ Bed temperature: Displays and adjusts the temperature of the heated bed.
⦁ Nozzle temperature: Controls the temperature of the extruder nozzle.
⦁ Lamp: Toggles the printer’s internal lighting for better visibility.
⦁ Aux Cooling Fan: Adjusts the auxiliary cooling fan speed for additional cooling needs.
⦁ Part Cooling Fan: Manages the cooling fan that directly affects the printed part.
⦁ Speed Level: Modifies the speed of the print process dynamically.
It is recommended not to adjust these controls and to leave them at their default settings.
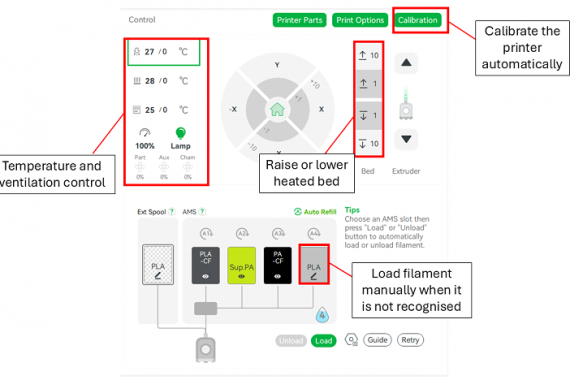
Figure 20 : Remote control interface